Hecklers in Development
Code, coffee, & camaraderie. Collection, unordered. ;)

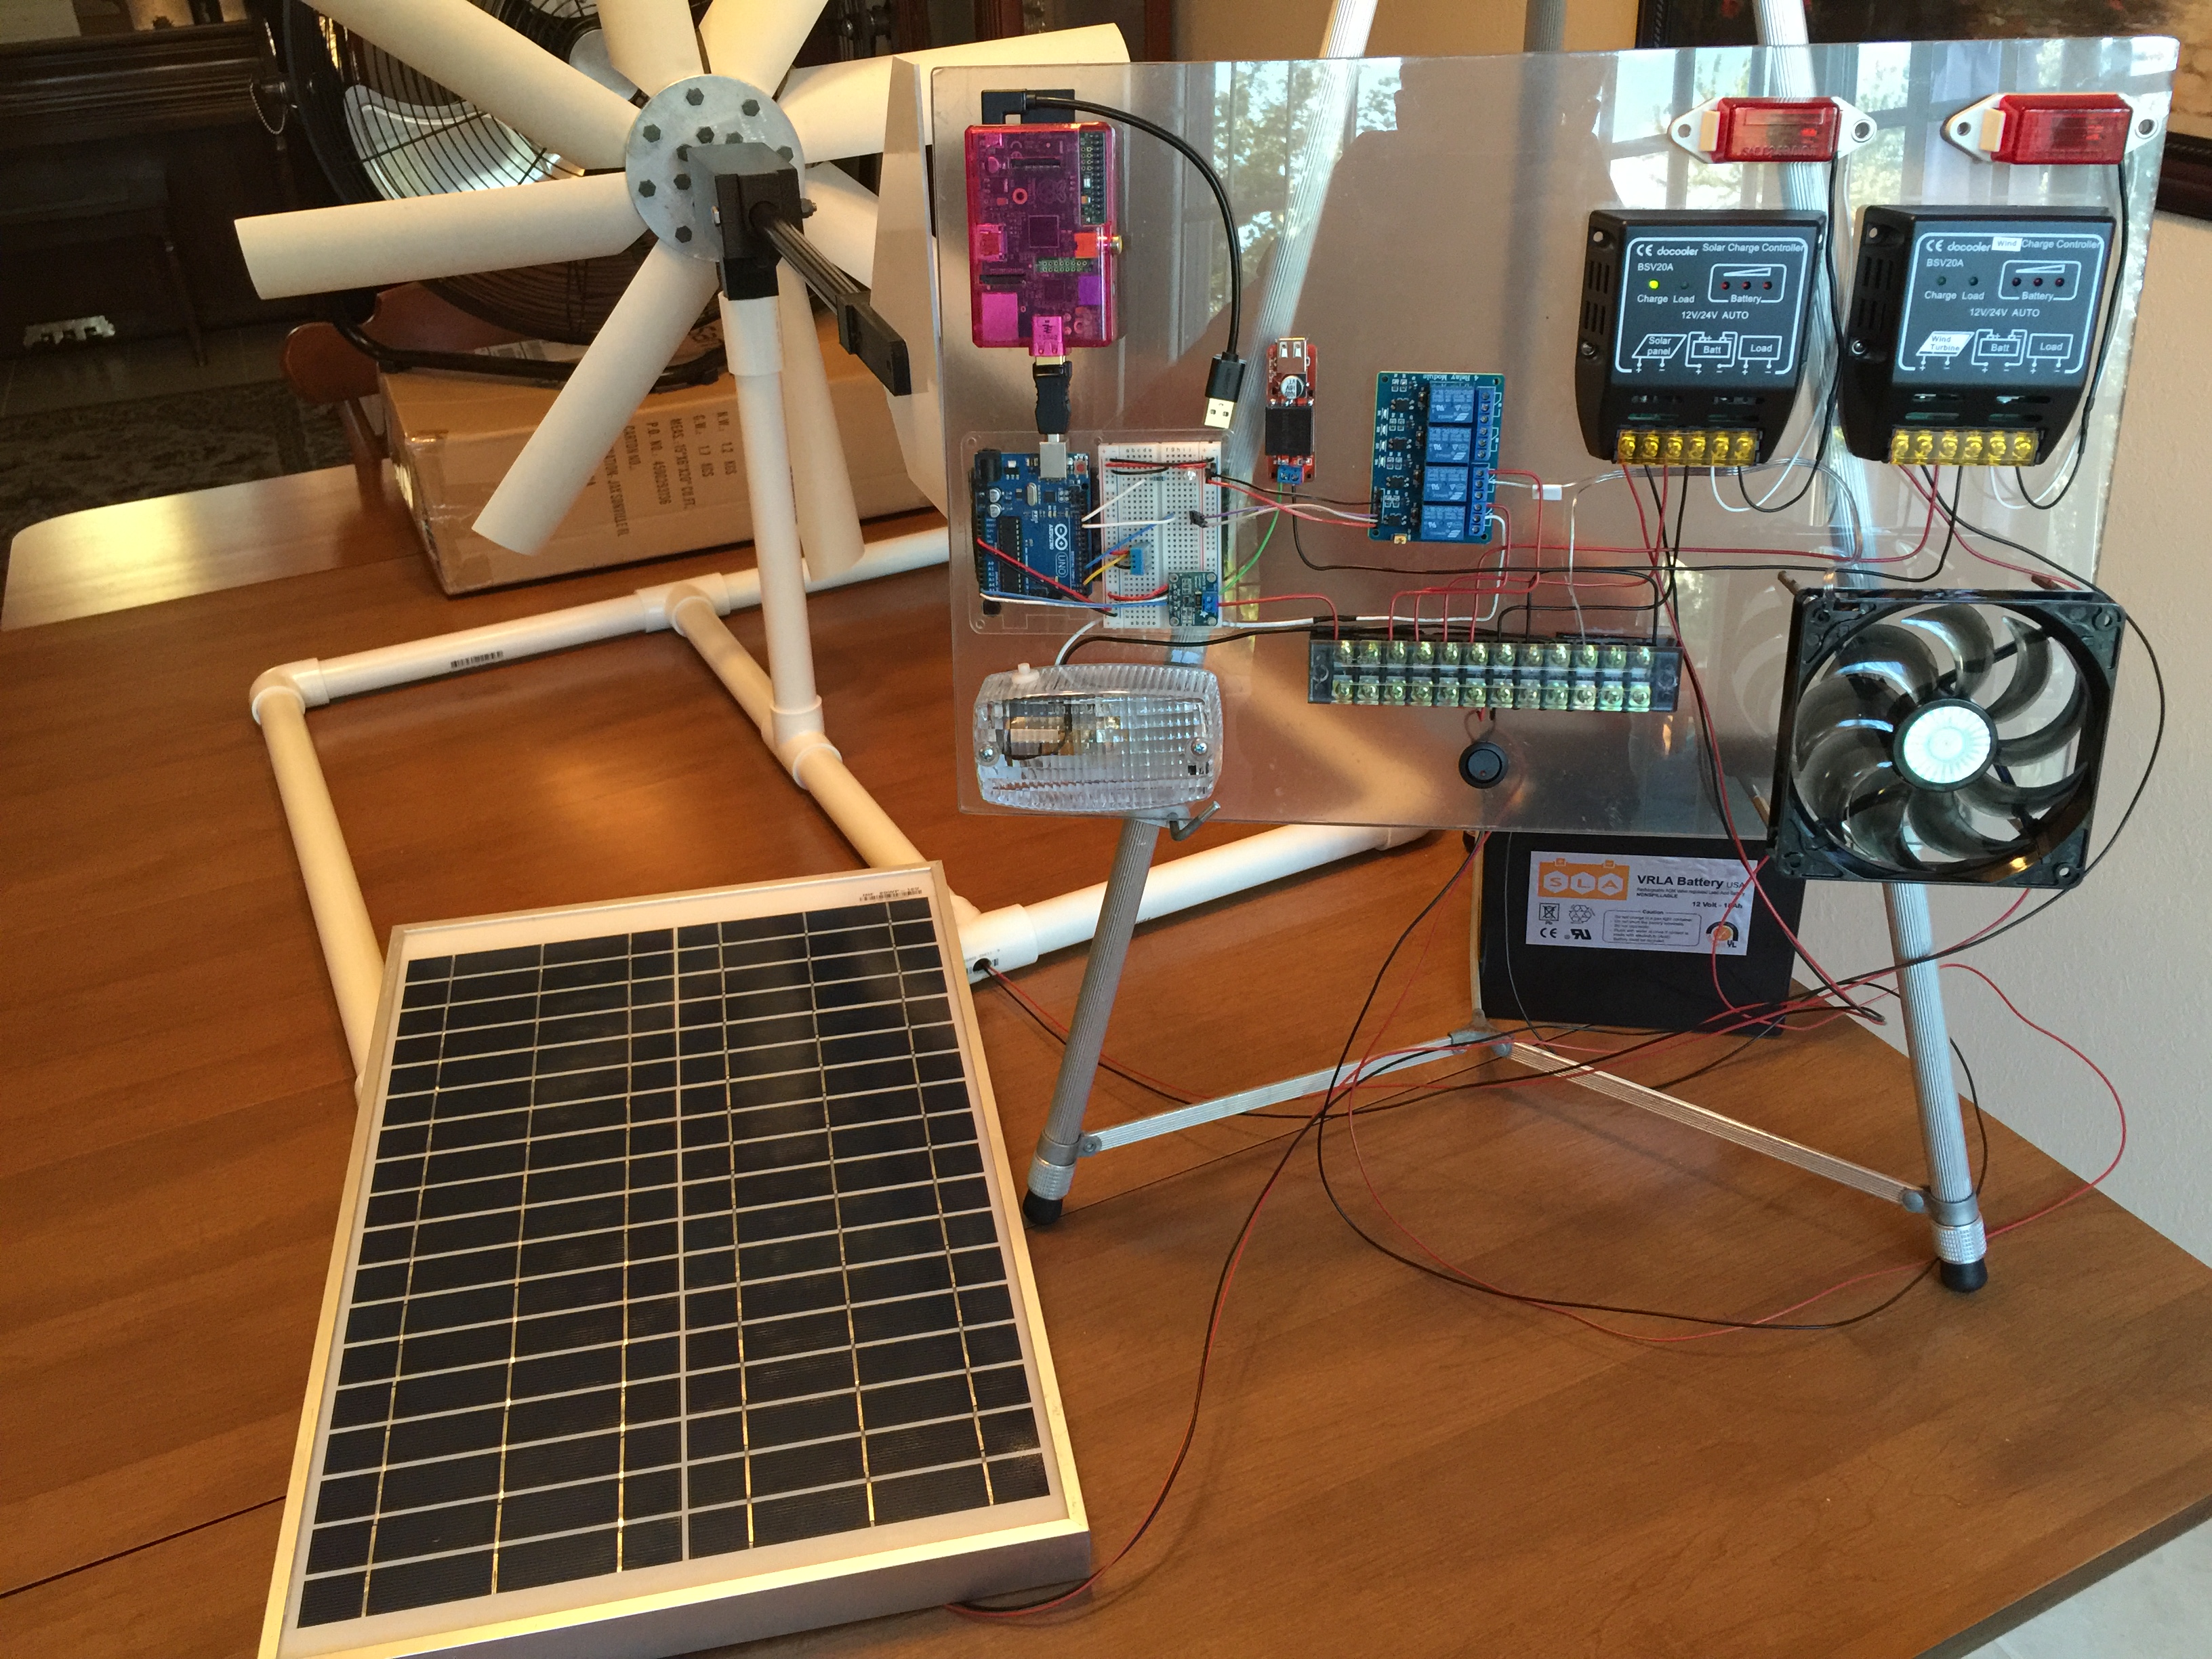
I’ve been working with Amazon’s Alexa & the Echo family of devices for the past several months and have created a couple of pretty useful and/or interesting skills. The first one I liked well enough to publish was QOTD, a Quote of the Day app that retrieves and reads a random quote per request. The second was Master Control Program, which enabled voice control of my home renewable energy system’s various inputs and controls.


I recently tweeted (@mkheck) a quote from the QOTD skill and got a bit of inspiration from a friend:


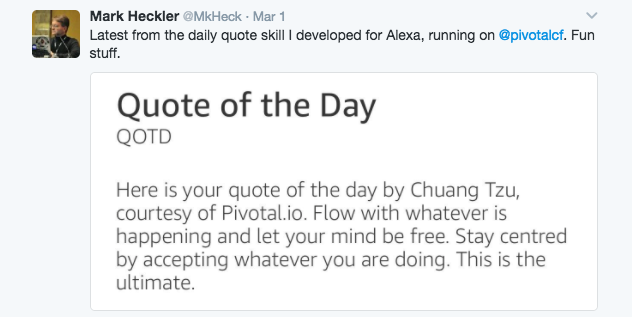
A bit of explanation may be in order. 🙂

Inspiration

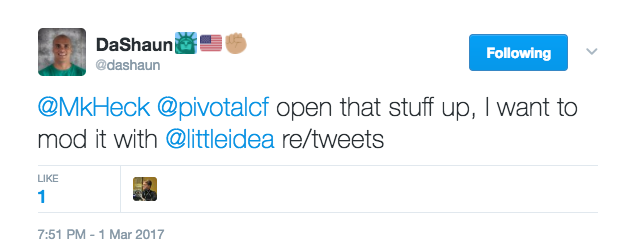
DaShaun got me thinking…there are some people who offer some excellent insights via their public Twitter accounts. He even pointed out one of those: Andrew Clay Shafer, a.k.a. “@littleidea”. Full disclaimer: Andrew also happens to lead our advocacy team at Pivotal. He says good things, and if you aren’t already following him, you should. Go. Now. 🙂


As DaShaun noted though, it might also be nice to request a random tweet from someone else. So whatever came of this, it should be flexible.

How to develop an Alexa skill

Overview

First things first: we can use AWS lambdas or provide our own cloud-based application, provided it responds to the appropriate requests appropriately. What does this mean?

  • You must implement the Speechlet API. Amazon makes this easy for Python, Node.js, & Java by providing libraries with the required functionality.
  • You must accept requests on an endpoint that you specify and provide correctly-formed responses.

That’s largely it. Of course, you’ll need an Amazon developer account. Sign up here to get started.

More details, please

This isn’t the only way to build a skill, but I’ve assembled inputs from several others and honed them in ways that make sense to me. Feel free to adapt/adjust as you see fit, and please share! Happy to alter my approach if yours makes life better/easier. 🙂

  • Create a “shell” Spring Boot app at https://start.spring.io, adding the Web dependency (and Lombok if you’re so inclined), downloading & unzipping the project and opening it in your favorite IDE
  • Add the following dependency to your pom.xml file (you aren’t a Gradle hipster, are you??!?!)
<dependency>
  <groupId>org.twitter4j</groupId>
  <artifactId>twitter4j-core</artifactId
  <version>[4.0,)</version>
</dependency>
<dependency>
  <groupId>com.amazon.alexa</groupId>
  <artifactId>alexa-skills-kit</artifactId>
  <version>1.2</version>
  <exclusions>
    <exclusion>
      <groupId>org.slf4j</groupId>
      <artifactId>slf4j-log4j12</artifactId>
    </exclusion>
  </exclusions>
</dependency>

NOTE 1: Twitter4j included for the Tweet Retriever project, may not apply to yours.

NOTE 2: The exclusion is currently necessary to avoid conflicts with dependencies included by Spring Boot’s starters.

  • Create a mechanism that will implement your desired “back end” functionality: retrieving a tweet, requesting weather from a public REST API, etc.
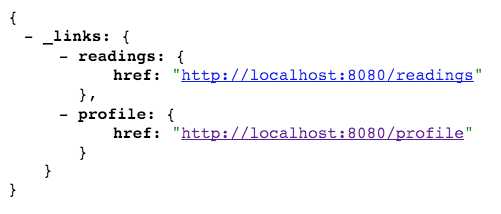
  • (Optional, strictly speaking) Create a REST endpoint you can use to test via web browser (old school text)  😉
  • To save yourself a lot of time & potential frustration, do the previous step. Then test. Extensively. Don’t continue until everything works the way you would like as a “plain old web service”. Once that works, then proceed to the next step.
  • Create an Intent Schema (JSON format) as required by the Alexa service. Within this schema, you’ll want/need to specify what intents your app will recognize and what slots (variables) are allowed or expected for each intent.
  • If you specify a slot, you’ll likely have a list of expected values for that slot (note that this is not a closed list per Amazon, but “more like guidelines”, for better & worse). I find it helpful to specify those slot values in separate files and store them (along with other textual inputs such as the Intent Schema & sample utterances Alexa uses for voice recog) with this project under a speechAssets directory in the project’s resources. Please refer to the project repo (link at bottom) for more information.
  • Create Sample Utterances Alexa will use to help guide its voice recognition, leveraging any slots you’ve defined in your Intent Schema. For example, in my Random Tweet skill, I define the following slot:
{
  "intent": "TweetIntent",
  "slots": [
    {
      "name": "Action",
      "type": "LIST_OF_ACTIONS"
    }
  ]
}

I specify valid actions as:

get
give
play
provide
show
read

To tie it together, one of my sample utterances is:

TweetIntent {Action} a tweet

The end result is that one way to activate the skill (once all steps are completed and the application is deployed) is with the following syntax:

"Alexa, ask Tweet Retriever to {get|give|play|provide|show|read} a tweet"
  • Create a Speechlet that implements Alexa’s Speechlet interface
  • Register that Speechlet (servlet) with your application, providing an endpoint (see above) with which Alexa will interact
  • Deploy the application to your cloud provider (Cloud Foundry, of course!)
  • Create the skill in the Amazon (Alexa) developer portal and make note of the Application Id Amazon assigns in the Skill Information page

NOTE: Be sure to include the endpoint address you specified when registering the speechlet in your application

  • Set your application’s required env vars (including the Application Id above), then restart the application to allow it to incorporate the updated values
  • From the Test page of the Skills portal, test the skill by invoking with textually and note the results
  • Next, test using your Echo device. This step is critical because it adds the voice recognition/parsing engine to the mix and often exposes issues that text-based invocations don’t.
  • If everything works as desired and you would like to share your skill with a larger community (Optional), publish your skill. You’ll need to provide a few additional bits of information & a couple icons, and it will need to be tested and verified by Amazon prior to it being published. If it fails, Amazon is quite good about providing feedback over any small items you missed and suggested remedies. Lather, rinse, repeat until successful. 😉

Caveats

This project is very early stage and thus very rough, so please keep the following things in mind:

  • This is version 0.1. It will change, it will improve. It’s an MBVP, a Minimum Barely Viable Product.
  • Alexa VR is unkind at times. 😉 For this 0.1 release, I incorporated a couple hacks to get more reliable results for certain Twitter handles:
    • For Andrew Clay Shafer’s Twitter handle (a compound word with two dictionary words, “little” & “idea”)
    • For my Twitter handle (a non-word that is stated as a combination of letters & a “word”, “M K Heck”). Twitter handles consisting of a single dictionary word pose no problem for Alexa/Twitter
  • I included Andrew’s handle per DaShaun’s request (see above)…and mine because I didn’t want to creep on Andrew by issuing repeated calls to Alexa while testing. 🙂 Feel free to adjust for your circumstances, if so desired.

For more Information

Get Tweet Retriever’s ax-random-tweet code here, check it out, and if you’re so inclined, submit a pull request! And thanks for reading.


Cheers,
Mark

Share

Related Posts:


Tags: , , , , , , ,

Or “How to build a portable self-powered, self-licking ice cream cone.”  😀


Portable IoT Demo


Several years ago, I started building what I referred to affectionately as a self-licking ice cream cone: a Renewable Energy (RE) system that powered the same IoT system that monitored it. I’ve given several talks about this system, both its hardware and its software stack, and there are so many useful (and scalable) lessons I’ve learned that I really enjoy sharing. Still learning those lessons too, btw.


Recently, Stephen Chin asked me if I could put together a portable RE IoT system to demo in the MakerZone at JavaOne this year. If a picture is worth a thousand words, a fully-built and on-premises demo must be worth at least a million, right? The idea intrigued me. Could I create a 100% fully-capable representation of a (my) real working system that would be small enough to transport to conferences and meaningful for attendees to see? Yes…yes, I thought I could.  🙂


It has been a lot of work fun!


There is much to tell, but we’ll stick to the high points for this post. More to follow.


Hardware List and Related Observations


For the portable configuration, here is the hardware I used:

  • One (1) 50W, 12V photovoltaic (PV) panel, bought via ebay
  • One (1) Cyber 250 wind turbine
  • One (1) 18Ah 12V deep cycle battery for energy storage and IoT system power
  • One (1) sheet of Lexan cut to size and edged, courtesy of Regal Plastics in St. Louis
  • One (1) Raspberry Pi, case, SD card, & wifi plug adapter – this serves as the IoT gateway device
  • One (1) 5V DC voltage regulator, allowing me to step down the 12V battery output to the 5V required by the Pi
  • One (1) Arduino Uno R3, solderless breadboard, combined mounting board – this represents an IoT endpoint
  • One (1) Adafruit INA219 high-side DC current sensor breakout
  • One (1) Virtuabotix DHT11 temperature & humidity sensor
  • One (1) 4 channel DC 5V relay to control physical devices
  • One (1) LED case cooling fan
  • One (1) interior/dome light to represent building interior lighting
  • Two (2) running lights to serve as loads for two RE inputs/charge controllers
  • Two (2) solar charge controllers**
  • One (1) 12 position terminal strip/wiring block
  • Numerous (?) solder joints, wires, and cables

** I was able to use solar charge controllers for both solar/PV and wind inputs because the wind turbine I selected produces 12V DC power (vs. the AC power output of many turbines) and has a blocking diode to prevent overspeeding, and thus turbine damage. These charge controllers also have load connectors, to which I attached lamps to maintain loads on the inputs, further reducing potential for overspeeding.


This configuration closely follows my permanent installation at my house, albeit at a much smaller scale. For transportability, I’m using only a single 18Ah 12V deep cycle battery instead of several larger-capacity 12V deep cycle batteries wired in parallel to form an energy storage array. And input sensors have been reduced from a full weather station providing temperature, humidity, rainfall, wind speed & direction, ambient lighting, and atmospheric pressure readings to (for the demo system) temperature and humidity. Power readings are comparable for both systems, although I’m using a separate INA219 sensor on the demo system vs. integrated power sensors in the permanent system’s weather circuitry. And my portable system has no actuators to open windows in my power-generation building like my permanent system does. Since the demo system is fully visible to viewers, there was no need to configure a camera for visual observation/checks as I did at home. In actuality, there are few substantive differences between my 24/7/365 production system and this portable demo. 🙂


One nice feature of this portable rig: as configured, it produces far more energy than it consumes, even with a fan providing the “wind” and venue lighting providing the “sun”. Power won’t be a problem.


Software and Related Observations


The software stack for the demo system is nearly identical to that of the production system, with minor changes being made to accommodate the minor differences in attached sensors and physical devices.


I developed software for the Arduino microcontroller to run in Autonomous Mode using sensible defaults, turning on heat when ambient temperature inside the power-generation building is too low, turning on a cooling fan when it’s too hot, and opening windows on opposite sides of the building when temps climb and no rain is present (no windows in the demo config, of course). The Arduino represents an IoT endpoint that regularly (1x/second) polls attached sensors, assembles their readings, and sends them “upstream” to the IoT gateway. It also processes any inputs received from the gateway and acts accordingly; if it receives a command to switch to Manual Override, the software then accepts and processes any subsequent (validated) commands from the gateway until directed to resume with Autonomous Mode.


For the IoT gateway, I used Linux and Java SE Embedded to create a secure and standards-based stack. Raspbian Linux allows me to use utilities like ssh and vnc and to set up startup scripts for the demo config…and since it ships with Java SE Embedded, I have easy access to developer tool support and libraries for everything from RESTful web services to Websocket, which I use for system/cloud communication. I used the JSSC (Java Simple Serial Connector) library to create a wired connection from gateway to endpoint, Pi to Arduino, establishing a reliable comm link within the remote IoT system.


IoT systems are great! But without a way to communicate with, control, and harvest meaningful data from those systems, their usefulness is severely constrained. To unleash the full value of an IoT system, you need the cloud. I used Java SE, Spring Boot, and Spring Cloud OSS to do the heavy lifting with an HTML5/JS user interface, all running on Pivotal Cloud Foundry. I’m still tweaking and expanding it (in my copious spare time 😉 ), but it’s effectively feature-complete…and with only minor differences (to accommodate the sensor/device differences) between the permanent and demo systems.


And…action!


More to Come


Come see me at JavaOne! This will be up and running in the MakerZone all week, so stop by to see it and chat with the crew there. If you have any questions, comments, or feedback of any kind, please ping me on Twitter at @MkHeck or leave a comment below. Hope to see you there!


Keep coding,
Mark


Share

Related Posts:


Tags: , , , , , , , , , ,

I’ve only been working with Pivotal Cloud Foundry since September 2015, but I’ve learned a great deal about it since then. I also realize there is much (much much) more to learn! The world doesn’t stand still, after all, and there are many stones I’ve yet to turn.


Sometimes I revisit something small-but-useful that I discovered long ago that I didn’t take the time to share at the time. I intend to be better about that, beginning now. If this is something you use frequently, please disregard; if there is something you use in lieu of this tip or any other, please share. 😉


Anyway, many times when deploying an application to Cloud Foundry, you will want to generate a unique URL to avoid “collisions”, i.e. attempting to reuse an in-use URL. In the past, you would insert a ${random-word} Expression Language, er, expression to do this, but at some point, the preferred approach changed. To accomplish this now, simply add random-route: true to your application’s manifest.yml file. It should look something like this:


This directs Cloud Foundry to generate a couple of words randomly and append them to your application name with hyphens, resulting in a URL that looks something like https://example-app-saprophagous-unkindliness.cfapps.io.


You can also use the command line option –random-route.


For more information, please refer to the Pivotal Cloud Foundry docs.


Hope this helps,
Mark

Share

Related Posts:


Tags: , , , , , , ,

At Jfokus this week, I was honored to be interviewed by Stephen Chin of Nighthacking.com. We discussed the Renewable Energy system I built and developed using industrial Internet of Things (IoT) concepts and Domain Driven Design principles. The core of the system is Java SE Embedded on the IoT Gateway device, Spring Boot + Cloud Foundry (CF) for the backend services, and an HTML5/JavaScript frontend application also delivered via CF…all accessible from any device, anywhere in the world. I was pushing code and controlling operations in St. Louis from Stockholm, Sweden – smoothly and speedily.  🙂


Anyway, here is the video. Hope you enjoy it!


Keep coding,
Mark

Share

Related Posts:


Tags: , , , , , , ,

It often surprises other devs when I suggest that Spring Boot is a perfect addition to the IoT developer’s toolbox. If you’re deep into IoT and have the luxury of another group providing all of your back-end and/or cloud platform code, that’s perfectly understandable. However, if you’re a full-stack developer, by choice or necessity, you need to know this! Grab a chair and a cup of coffee; I think you’ll find this interesting (and useful).

Let Me Just Put This Out There

Here is what most people imagine when they hear “IoT”:


Internet of THINGS


But this is what they should be thinking:

INTERNET of Things


The things get most of the attention, mindshare, and “buzz”. Why is that? Well…because gadgets are cool! Most of us chose to be developers because of the fun/interesting/obsessive parts, not because of the dull bits. And while there are usually fun and (ahem) less-fun components to everything, who can resist gadgetry in general?


Ah, but without connectivity, without storage, without the ability to monitor, manage, and analyze those often-remote sensors and controls…what do we have? Truthfully, not much. Something interesting, but barely so; a school science project, perhaps. The real payoff (in money and intrigue) is in what happens when you connect those “things”. Without a versatile and reliable platform behind those devices, you just have islands of misfit toys.


This is where Spring Boot really shines: helping you to create meaningful software at velocity. Software that is clean, concise, readable, maintainable…and built Cloud Native. We’ll come back to that last part over the next few installments, but for now, let’s focus upon building a basic platform to enable your IoT to mean something.

Choose Your Legos(TM)

Spring Boot integrates several useful capabilities into a single, coherent code framework and approach. In a nutshell, it helps a developer rapidly build stand-alone applications that incorporate and integrate with various third-party libraries that can be deployed anywhere a JAR will run. Anywhere. It’s open source, opinionated (minimal configuration, but flexible to fully accommodate edge cases), and insanely effective. Coming from a more staid environment, I found my first exposure to Spring Boot (and every one since) surprising and refreshing. If so-called enterprise software development sounds boring to you, you probably haven’t taken Boot for a test drive.


And that’s it! Kidding, that’s not it. But Spring Boot does bring along several goodies that streamline the effort it takes to build robust back end applications. Remember how I said it’s “opinionated”? Let’s examine a few of its carefully-chosen opinions, step through building a simple cloud-ready application for your IoT system, and then see where that takes us. Shall we?

On Your Mark, Get Set, Go!

The Spring Initializr gets our project off to a running start. There are several ways to accomplish this, but since we’re taking the simplest path possible for this first example, let’s just point our browsers to start.spring.io. Spring Boot gives you options, such as a Gradle-based build, various versions of Boot, Java/Groovy, and packaging (JAR vs. WAR), but we’ll stick to most of the defaults for our example.


NOTE: To see all of the choices at your disposal, simply click the “Switch to the full version.” link at the bottom of the page.


Here are the choices we’ll make for our example:

  • Maven Project
  • Latest non-snapshot version of Spring Boot
  • Group: org.thehecklers (feel free to use your own)
  • Artifact: iot-service
  • Dependencies: Web, JPA*, H2**, REST Repositories

* For this example, we’ll use a JPA data source, but feel free to choose a NoSQL option. Boot gives you many data source options out of the box, and of course, you can “bring your own” with a bit more effort.
** H2 is an in-memory database. While unsuitable for environments in which physical persistence is a requirement, it functions the same from a developer perspective and satisfies our demo requirements nicely for now.


Once we’ve made the above selections, simply click the Generate Project button to have the Spring Initializr generate a skeleton project, bundle it into a .zip file, and serve it up for download. Save it locally, unzip it, and open the project in your favorite IDE to get started coding.

Building your IoT Service

With just that little bit of effort, we already have the foundation in place for our IoT back end service. You can verify this by running the app and pointing your browser to localhost:8080. You should see the following:

“Large streams from little fountains flow, Tall oaks from little acorns grow.”

For this installment, we’ll focus on the MVP (Minimum Viable Product) needed to support our nascent IoT installation. Assuming we’ll need to track readings captured by one or more sensors, let’s define an Entity class for our Readings:


The annotations @Entity, @Id, and @GeneratedValue are from the Java Persistence API (JPA) standard and identify/describe the class and its Id attribute as a JPA entity and its primary key, respectively. Aside from these annotations, the Reading class is just a straightforward POJO.


Next, we face the daunting task of creating the following functionality:

  • REST endpoint(s) via which our devices can provide (POST) readings
  • REST endpoint(s) allowing us to retrieve (GET) readings for review, reporting, and analysis
  • Mechanism(s) for storage and retrieval of readings from our chosen data store

Spring makes this functionality easy to implement. Spring Data REST was one of the dependencies we included when we created this project (REST Repositories), and by simply extending a Spring Data repository interface specifying the Reading class and Id type and annotating our new interface as a RepositoryRestResource, the repository is exposed via a REST API. For now, this meets our needs nicely:


Re-running our application and refreshing our browser page (localhost:8080) confirms that our REST endpoint for readings is now active:

Getting there...

Getting there…

Next, let’s test functionality by emulating a device pushing readings to our IoT service. I used curl, but feel free to use whatever means you prefer to POST to a REST endpoint.


Then we verify using a vanilla curl GET:


Here we see the two readings I created in testing, returned via our GET request:


If you’ve been pair-programming with me, congratulations! You have now created your first very basic IoT service…and since we had Spring Boot build a fully self-contained “uberJAR” (bringing its own container with it), it can be deployed wherever Java is installed. Who would have thought it could be this fast (or fun)?!?

Future Articles, Future Enhancements

As we proceed, there are several topics we will expand upon, options/adjustments we will explore (WebSocket, SQL & NoSQL persistence, …), functionality we can add (security, tailored queries, visualizations, …), and of course, we’ll leverage Spring Boot’s focus upon Cloud Native Java to deploy quickly and easily to the leading open source cloud platform, Cloud Foundry. If you have comments, questions, or suggestions, please leave them below! For updates, please follow me on Twitter at @MkHeck.


Keep coding,
Mark

Additional Information

Spring Initializr
Spring Boot

Spring Data REST
Spring Getting Started Guides
Cloud Foundry
Pivotal Cloud Foundry
Pivotal Web Services (for free trial)

Share

Related Posts:


Tags: , , , , , , , ,

Powered by Wordpress
Theme © 2005 - 2009 FrederikM.de, heavily modified by Mark Heckler
BlueMod is a modification of the blueblog_DE Theme by Oliver Wunder